|
FQL v4 will be decommissioned on June 30, 2025. Ensure that you complete your migration from FQL v4 to FQL v10 by that date. For more details, review the migration guide. Contact support@fauna.com with any questions. |
Authentication and authorization
Welcome back, fellow space developer!
In the final part of the tutorial, we’re going to take a look at authentication and authorization in Fauna.
Introduction
Authentication and authorization are commonly implemented in the application layer. Fauna follows a different approach by centralizing those right at the database.
This means that any piece of code can now become a client of your database without having to recreate authentication or authorization logic:
-
Mobile apps,
-
Server applications,
-
Cloud functions,
-
Microservices,
-
Frontend web apps,
-
Desktop apps,
-
etc.
Before we get to the code, let me introduce a couple of core concepts.
About tokens, keys, and secrets
Fauna is secure by default. To execute queries, you always need to pass a secret, which is associated either with an application key or an access token.
Application keys
Like their name implies, application keys are used by your applications. Each key has its own secret and can be used any number of times on multiple applications.
You create keys manually using FQL, or via the Fauna Dashboard. Keys do not expire until you manually delete them.
Access tokens
Tokens are somewhat similar to keys, but are used by users instead of applications. Tokens and their secrets are usually generated for you when you authenticate successfully with Fauna, so a single user could use multiple secrets in different devices simultaneously.
Tokens can be deleted manually, or when a user logs out. It’s also possible to define an optional time-to-live setting to determine how long a token is valid.
Introduction to roles and privileges
Fauna features a fine-grained authorization system based on attributes, also known as ABAC (attribute-based access control).
Custom roles and privileges
Roles grant privileges to keys and tokens to access resources in the database. The most important types of resources that you can grant access to are:
-
Documents
-
Collections
-
Indexes
-
User-defined functions (UDFs in short)
These privileges can range from "this role can read and delete any document of this collection" to more sophisticated behaviors such as "this role can modify this document if the logged in user is its author".
Creating a server key
As explained before, if you’re accessing Fauna from a server-side environment, you need an application key and its secret.
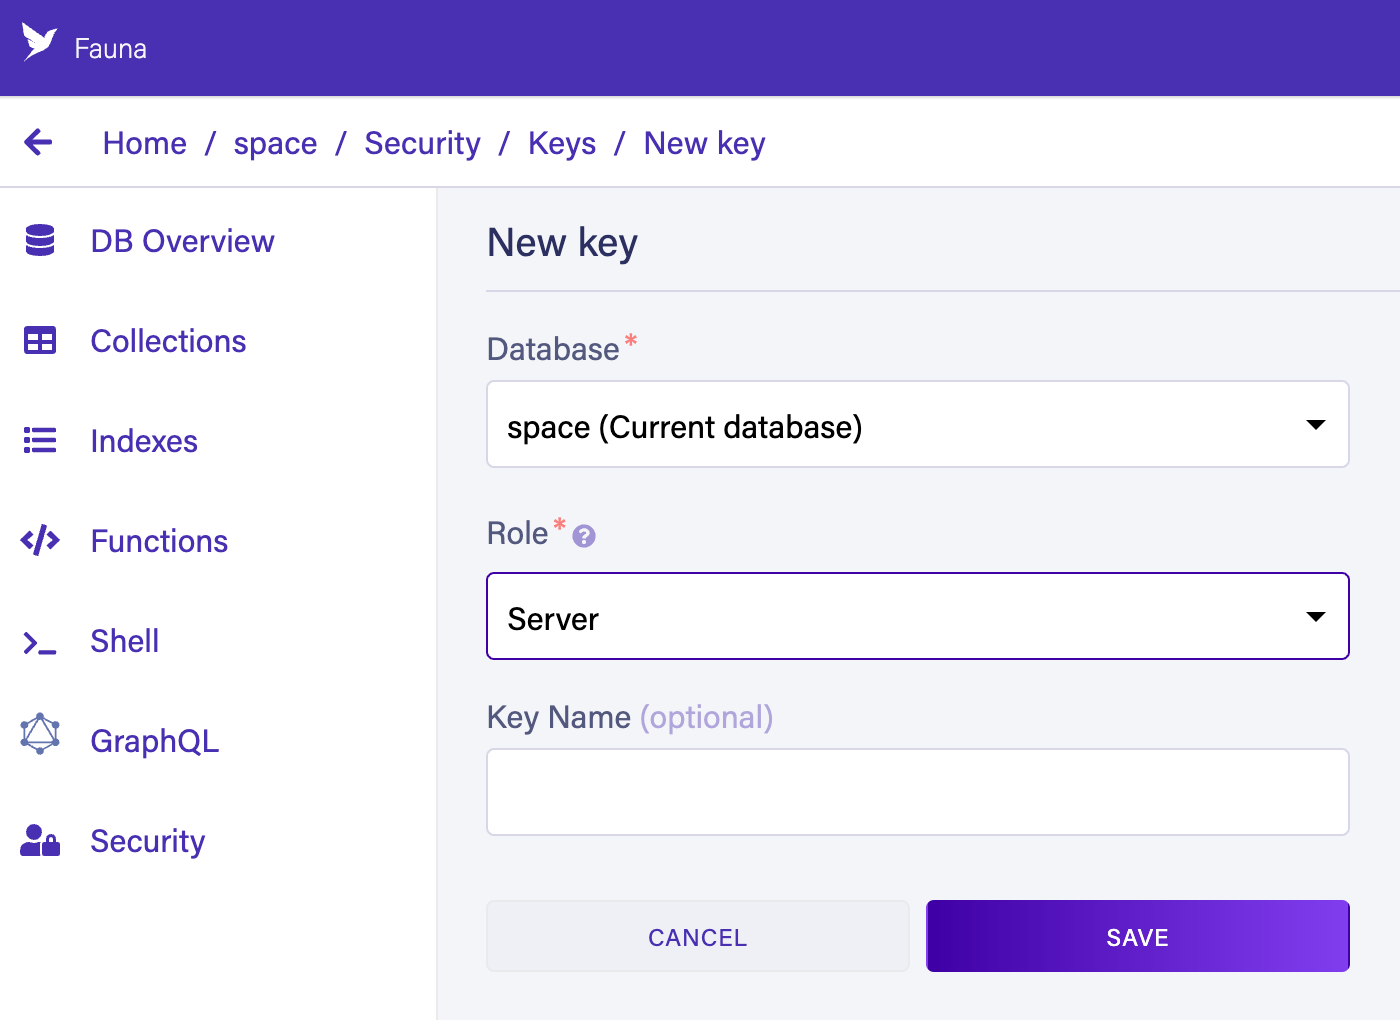
The easiest way to create keys is from the security tab in the Fauna Dashboard:

Select the Server role in the dropdown, which grants this key access
to everything in the database, then click Save.
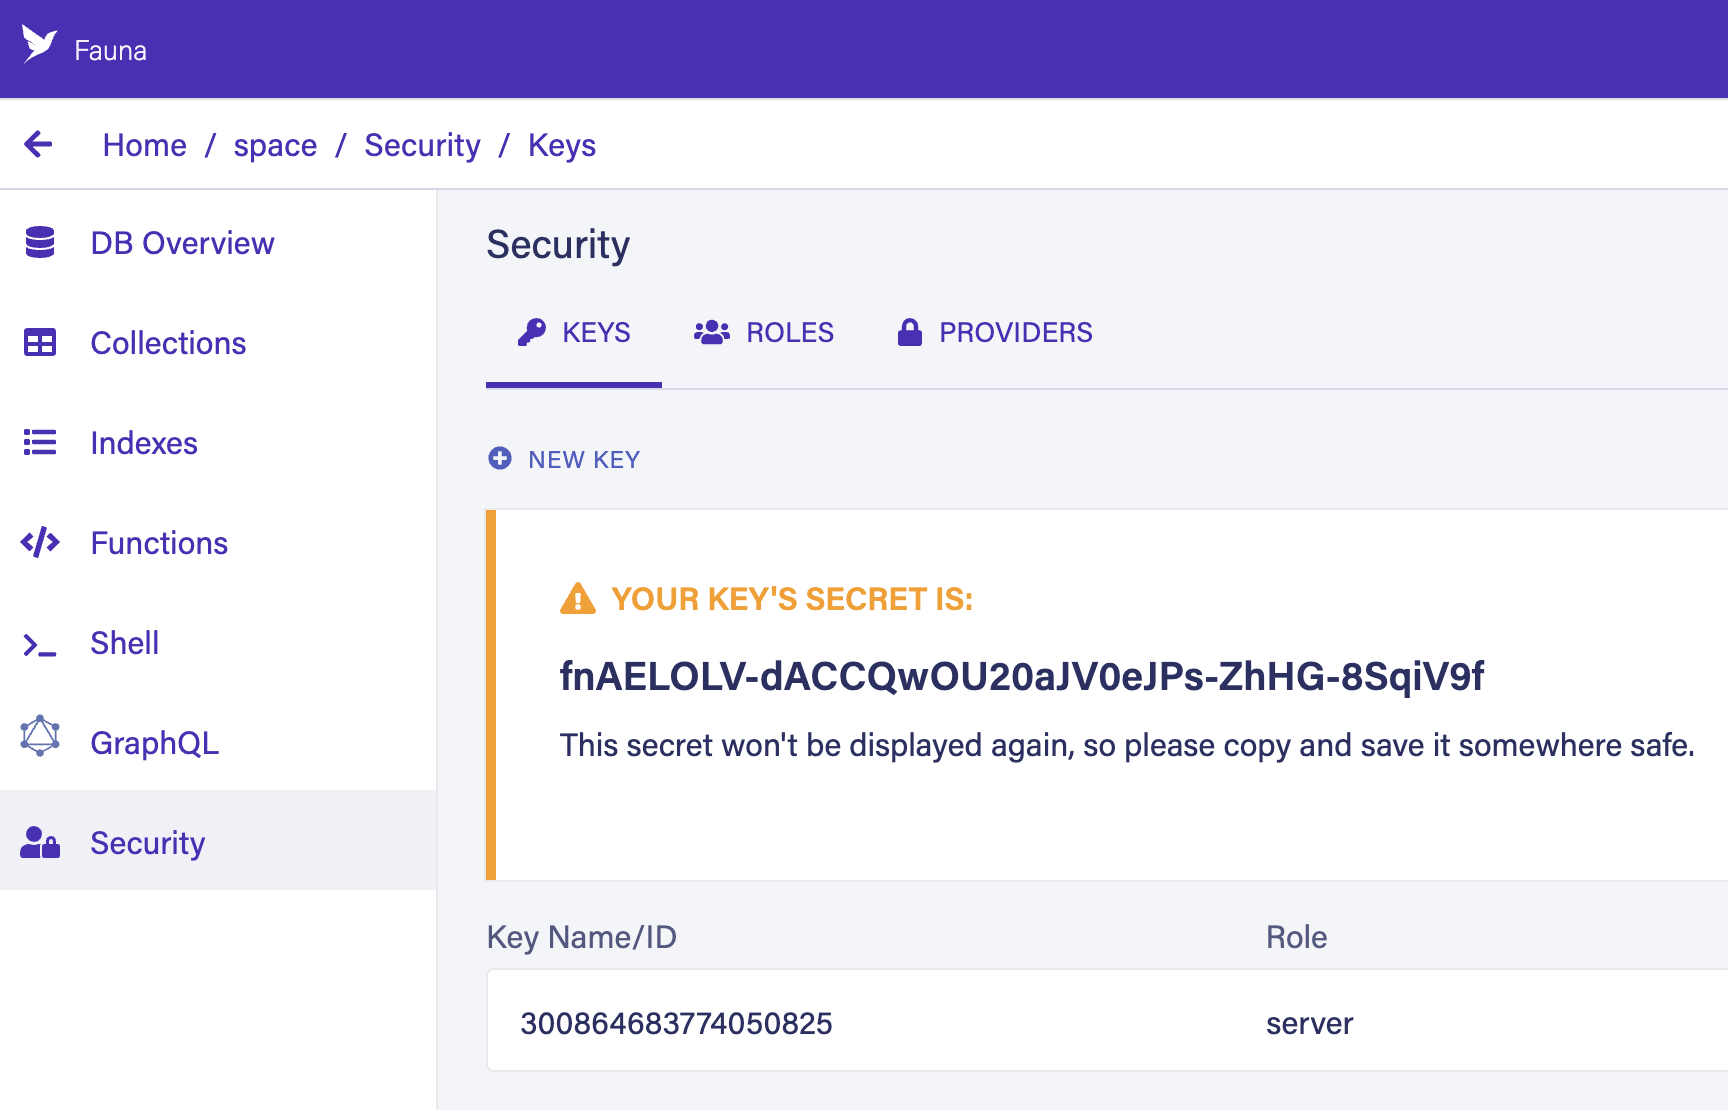
After creating your key, Fauna provides its secret, which you use in your code. Don’t forget to store it somewhere safe. It is never displayed again.

| The secret included in the screenshot is no longer valid. |
You can also create keys with FQL using the CreateKey function:
CreateKey({
  role: "server"
})
{
ref: Key("269237655682679301"),
ts: 1593023887265000,
role: "server",
secret: "fnAD2jBXDQACCiJKYnAPmZtQE4ZxXwVerQ-B29jb",
hashed_secret: "$2a$05$MPFpLVrMFV5Qszfe2lqwG.FvH.LvVeRyNoH4DQd4qbOiZ9N7uzk82"
}About client-side keys
If you’re accessing Fauna from a client-side environment (e.g., frontend web app), you should never use a key with a server role. Anyone would be able to read the key from your JavaScript code and gain full access to the database.
Again, don’t use server keys in your frontend web app.
That said, it’s certainly possible to query Fauna directly from your frontend apps or mobile apps by creating keys with custom roles. Depending on the security features that you desire, you could go with a frontend-only approach and move the authentication flow server-side.
For simplicity’s sake, from now on we’re just going to assume short-lived access tokens are generated server-side. These tokens could then be used from any type of application.
Basics of authentication
Let’s see how to solve one of the most common authentication scenarios: logging in a user with an email and a password.
Before we get into the details, let’s create a new collection for our users:
CreateCollection({name: "SpaceUsers"})Where to store the password?
You might be tempted to store a hashed password in the user document like you’ve probably done with other databases:
Create(
  Collection("SpaceUsers"),
  {
    data: {
      email: "darth@empire.com",
      password: "$2y$12$XUxxWc.81aq4CKsV/..."
    }
  }
)
You could certainly do that if you wanted to roll your own authentication system, but Fauna already includes a better way which is easier to use and more secure.
Ok, so where do we store the password, and how do we use it?
I mentioned earlier that access tokens are used by users. The way to tell Fauna that an entity (such as a user document) "has a password" is by adding a credentials object to the metadata of a document.
With this in mind, let’s create our first user:
Create(
  Collection("SpaceUsers"),
  {
    data: {
      email: "darth@empire.com"
    },
    credentials: {
      password: "iamyourfather"
    }
  }
)
{
ref: Ref(Collection("SpaceUsers"), "269170966886613509"),
ts: 1592960287940000,
data: {
email: "darth@empire.com"
}
}As you can see, the credentials object is not part of the document’s data and it’s never returned when accessing the document. Because of that, you won’t be able to expose the hashed credentials by mistake.
It really doesn’t matter where these credentials are stored. All the encryption and verification of passwords is solved for you when using Fauna’s authentication system.
Logging in
Since credentials are associated with documents, we need to find a
user’s document in the SpaceUsers collection to be able to log them
in.
Let’s create an index to do just that, and make sure there can only be one user for each email address by setting unique to true:
CreateIndex({
  name: "SpaceUsers_by_email",
  source: Collection("SpaceUsers"),
  terms: [{field: ["data", "email"]}],
  unique: true
})
Now, we can use the Login function
in combination with the SpaceUsers_by_email index.
Login(
  Match(Index("SpaceUsers_by_email"), "darth@empire.com"),
  {
    password: "iamyourfather",
    ttl: TimeAdd(Now(), 3, 'hour')
  }
)
{
ref: Ref(Ref("tokens"), "269770764488540678"),
ts: 1593532299503000,
ttl: Time("2020-06-30T18:51:39.033543Z"),
instance: Ref(Collection("SpaceUsers"), "269170966886613509"),
secret: "fnEDvQsUvCaCBgOyQyF10AITzhwm2fkyWe7m8Qwz15CFnu1sGQ9"
}The Login function first takes a reference to a document or a set
produced by the Match function. Its
second argument is an object with the password and an optional
time-to-live.
If everything is okay, a new access token is created and returned to us with a secret that we can use in our application.
Obviously, if the credentials are wrong, Fauna returns an error:
Login(
  Match(Index("SpaceUsers_by_email"), "darth@empire.com"),
  {password: "darksidemaster"}
)
error: authentication failed
The document was not found or provided password was incorrect.Authentication in your application
Let’s see how we’d actually authenticate our users in a server-side JavaScript application. The approach should be very similar if you’re using Fauna with other programming languages.
First, we’d need to import Fauna’s driver and define a couple of constants:
const faunadb = require('faunadb');
const q = faunadb.query;
const SERVER_SECRET = "BQOyQyF20AITt7nMIqW1XzW...";
We’re hard-coding the secret here for simplicity’s sake. Even in a server-side project, you should get the secret from an environment config and avoid committing it to Git with your code.
Then, we instantiate our client using the secret from our server key:
const client = new faunadb.Client({
  secret: SERVER_SECRET
});
Finally, here’s an example of an authentication function:
async function authenticate (email, password) {
  return await client.query(
    q.Login(
      q.Match(q.Index('SpaceUsers_by_email'), email),
      {password: password}
    )
  );
}
After a successful login, we receive an access token document with its secret, like we saw previously:
{
  ref: Ref(Ref("tokens"), "269174603208720901"),
  ts: 1592963755720000,
  instance: Ref(Collection("SpaceUsers"), "269170966886613509"),
  secret: "fnEDvezg4tACBqOyQyF2QAiTt2nMIqW5XzWcQykZiZx59Wyvm8e"
}
Now that we have a token for our user, we should be using its secret for any subsequent queries to Fauna on behalf of our user.
You have many options for storing the secret. Here are some examples:
-
Pure client-side: If you intend on accessing Fauna client-side, you could send the secret back to the client and store it in memory.
-
Partial backend with cookie: If you’re working on a server API, you could store the secret in a session and send it back to the client using a secure cookie.
-
Partial backend with httpOnly cookie: You could also combine the above two approaches by creating two types of tokens in Fauna. One that could be used as a refresh token and stored in an httpOnly cookie, and another short-lived one that could be used and stored in the frontend.
-
Full blown backend: You could also decide that you never want your clients receiving the secret and store the session in some cache and send back just a session ID.
These examples have very different security implications which are far too vast and complex to discuss in this introductory tutorial. You have to decide carefully how you want to manage secrets for your particular use case.
Logging out
To log out, we use the Logout
function, which destroys the token that we created when logging in.
This could be our logout function:
async function logout (deleteAllTokens = false) {
  return await client.query(q.Logout(deleteAllTokens));
}| We don’t need to pass any reference to the token, since we instantiated the client with a token’s secret. |
Logout takes a single boolean parameter to determine if all of the
tokens associated with a user should be deleted, or only the one being
used with the current secret. If we had used q.Logout(true), our user
Darth would now be logged out from all his devices. Take that, evil Sith
Lord!
Also note that Logout is actually a convenience function. You could
also delete tokens manually with a reference to the token’s document:
Delete(Ref(Ref("tokens"), "269174603208720901"))Advanced authentication
You can keep using Fauna’s authentication system even for custom scenarios without having to roll your own system from scratch.
For example, you can create your own tokens with:
Create(Tokens(), {
  instance: Ref(Collection("SpaceUsers"), "269170966886613509"),
  // NOTE: be sure to use the correct document ID here
  ttl: TimeAdd(Now(), 3, 'hour')
})
{
ref: Ref(Ref("tokens"), "269776756060193286"),
ts: 1593538013760000,
instance: Ref(Collection("SpaceUsers"), "269170966886613509"),
ttl: Time("2020-06-30T20:26:53.134950Z"),
secret: "fnEdvqCHWaACbg3yQ4F20aITOP_50s0uzQdXKZt6eEdMhZ48Bxw"
}And, then, use these other FQL functions to customize your authentication logic:
-
The
Identifyfunction checks whether a password is valid against a document’s credentials. -
The
HasIdentityfunction checks whether the current Fauna token is associated with a document or not.
Your first custom role
Our users can now log in, but they can’t access any resource in our database. We need to create a role to give them access to collections, indexes, etc.
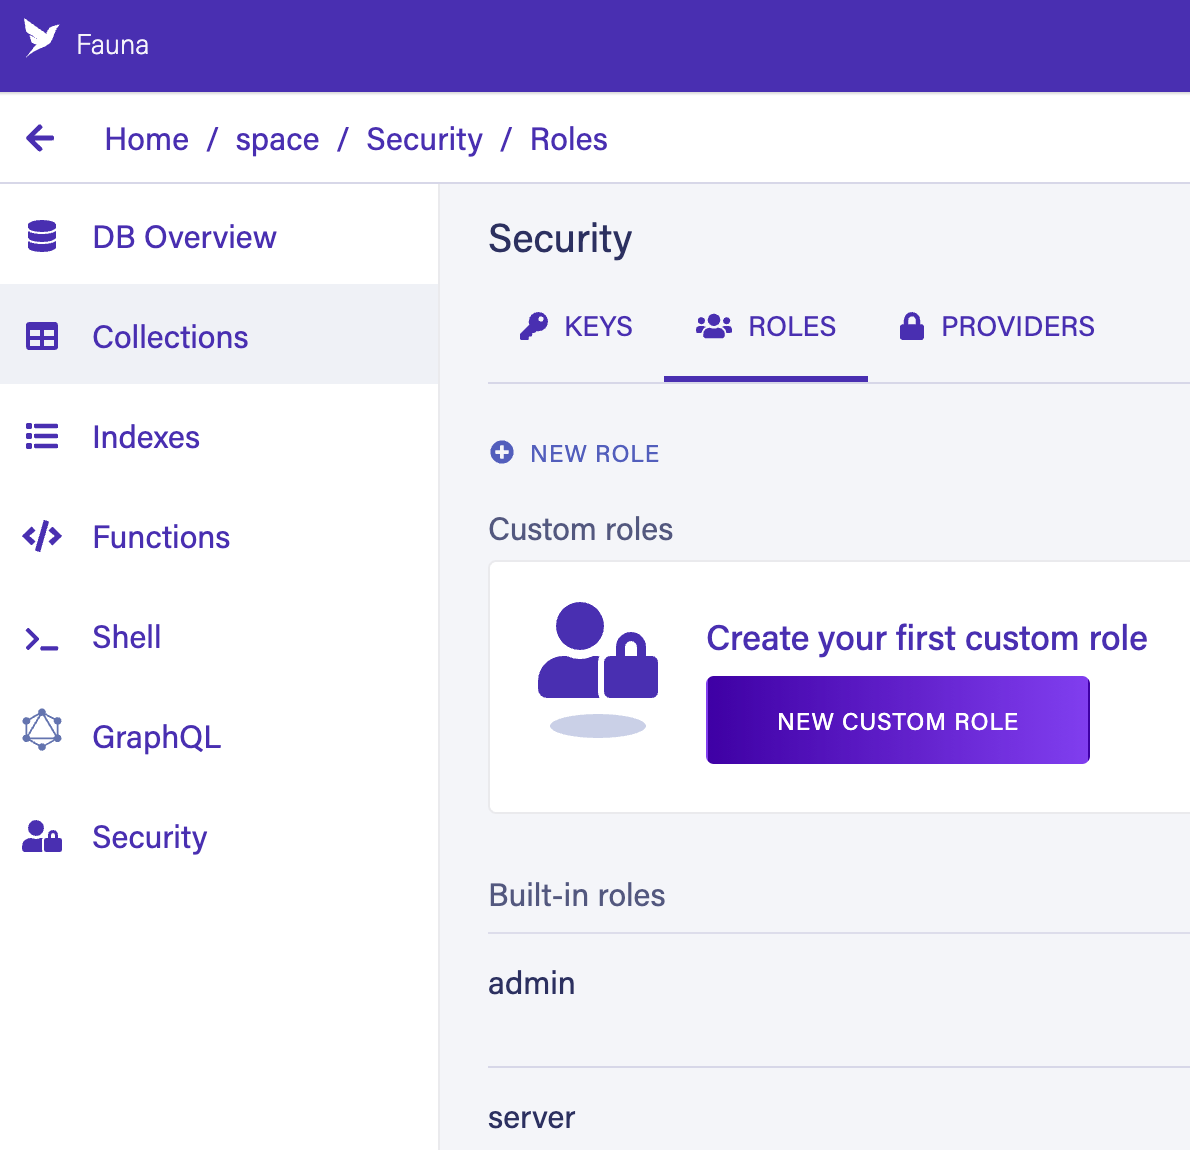
Keep in mind that you can also manage roles from the dashboard. If you go to the security tab and click on Roles, you’ll find the roles section:

Let’s start with something simple and create a User role with a
single privilege:
CreateRole({
  name: "User",
  membership: {
    resource: Collection("SpaceUsers")
  },
  privileges: [
    {resource: Collection("Spaceships"), actions: {read: true}}
  ]
})
The SpaceUsers collection is now a member of the User role. Any
token associated with a document from that collection inherits the
role’s privileges, including previously-created tokens.
We’ve also granted a single read-only privilege on any document from the Spaceships collection. For more information on privileges, see Privileges.
Darth is now be able to retrieve any Spaceships document, but he won’t be able to create new documents in that collection or modify existing ones.
He won’t be able to use any indexes either, but he can use the
Get function to retrieve a specific
spaceship document and also list all spaceship documents using the
Documents function that we saw
in previous sections of this tutorial:
Map(
  Paginate(Documents(Collection("Spaceships"))),
  Lambda("ref", Get(Var("ref")))
)
Updating roles
Let’s update the role with another privilege by using the
Update function. Remember that we
need to pass all privileges, including the ones we had previously set,
because Update replaces the entire array.
Update(
  Role("User"),
  {
    privileges: [
      { resource: Collection("Spaceships"), actions: { read: true } },
      { resource: Collection("Planets"), actions: { read: true } }
    ]
  }
)| Existing keys and tokens belonging to a role are affected by the updated privileges. |
Fine-grained privileges
It’s also possible to create custom behaviors for privileges instead of
simply using true or false.
For example, we might want Darth to be able to access his own
SpaceUsers document, but we certainly don’t want him poking around all
of the users' documents to obtain their email addresses and spam them to
join his empire.
We do that by using a Lambda
function to define any type of behavior we might need:
Update(
  Role("User"),
  {
    privileges: [
      { resource: Collection("Spaceships"), actions: { read: true } },
      { resource: Collection("Planets"), actions: { read: true } },
      {
        resource: Collection("SpaceUsers"),
        actions: {
          read: Query(
            Lambda("ref",
              Equals(
                CurrentIdentity(),
                Var("ref")
              )
            )
          )
        }
      }
    ]
  }
)
In this case, we’ve used this Lambda function on the read action for
the SpaceUsers collection:
Query(
  Lambda("ref",
    Equals(
      CurrentIdentity(),
      Var("ref")
    )
  )
)-
We need to use the
Queryfunction because we don’t want theLambdafunction to execute when we’re only updating the role itself. -
Whenever a
SpaceUsersdocument is accessed, Fauna triggers theLambdaand passes a reference of the document that it’s checking. Access is granted only if theLambdareturnstrue. -
The
CurrentIdentityfunction returns a reference to the document associated with the current token in use. In our example, it would return the document in theSpaceUserscollection for the current, logged in user. -
The
Equalsfunction returnstrueorfalsewhen comparing the reference returned byCurrentIdentityto the reference of the document that we’re trying to read.
In plain English: "if the document in the SpaceUsers collection is the
same as the document we’ve logged in with, return true, otherwise return
`false`".
To test this, let’s create a new user:
Create(
  Collection("SpaceUsers"),
  {
    data: {
      email: "yoda@jedi.com"
    },
    credentials: {
      password: "thereisnotry"
    }
  }
)
{
ref: Ref(Collection("SpaceUsers"), "269412903498547719"),
ts: 1593191016630000,
data: {
email: "yoda@jedi.com"
}
}So now, if we try to access Yoda’s document using Darth’s token in our application, we get an error:
try {
  const result = await client.query(
    q.Get(q.Ref(q.Collection("SpaceUsers"), "269412903498547719"))
  )
} catch (error) {
  console.log(error);
}
[PermissionDenied: permission denied] {
name: 'PermissionDenied',
message: 'permission denied',
description: 'Insufficient privileges to perform the action.',
...But it works fine if we try to access Darth’s document:
q.Get(q.Ref(q.Collection("SpaceUsers"), "269170966886613509")){
ref: Ref(Collection("SpaceUsers"), "269170966886613509"),
ts: 1592960287940000,
data: { email: 'darth@empire.com' }
}Fine-grained memberships
Just as we can use the Lambda
function to define custom behaviors to check whether a role can do
something, we can also create fine-grained memberships and determine
which documents in a collection are members of a role.
Let’s create a new user to test this:
Create(
  Collection("SpaceUsers"),
  {
    data: {
      email: "han@solo.com",
      isPilot: true
    },
    credentials: {
      password: "dontgetcocky"
    }
  }
)
{
ref: Ref(Collection("SpaceUsers"), "269417695003279879"),
ts: 1593195586136000,
data: {
email: "han@solo.com",
isPilot: true
}
}Now, let’s create a new Pilot role that only grant permissions to
users with the isPilot property. We do that by adding a predicate
function to the membership object:
CreateRole({
  name: "Pilot",
  membership: {
    resource: Collection("SpaceUsers"),
    predicate:
      Query(
        Lambda(
          "ref",
          Select(["data","isPilot"], Get(Var("ref")), false)
        )
      )
  },
  privileges: [
    {resource: Collection("Spaceships"), actions: {create: true}}
  ]
})
We’ve added a privilege that simply allows creating documents in the
Spaceships collection.
Let’s look at the membership predicate function:
Query(
  Lambda(
    "ref",
    Select(
      ["data","isPilot"],
      Get(Var("ref")),
      false
    )
  )
)In plain English: "if the document in the SpaceUsers collection
contains the isPilot field, and it is set to true, the logged-in
user can create documents in the SpaceShips collection".
As expected, if we try to create a new ship with Darth’s token, we
receive an error because the User role doesn’t have that privilege:
try {
  const result = await client.query(
    q.Create(
      q.Collection("Spaceships"),
      {
        data: {
          name: "Imperial Destroyer"
        }
      }
    )
  )
  console.log(result);
} catch (error) {
  console.log(error);
}
[PermissionDenied: permission denied] {
name: 'PermissionDenied',
message: 'permission denied',
description: 'Insufficient privileges to perform the action.',
...But if we do it with Han’s token instead:
const result = await client.query(
  q.Create(
    q.Collection("Spaceships"),
    {
      data: {
        name: "Millennium Falcon"
      }
    }
  )
)
{
ref: Ref(Collection("Spaceships"), "269419218694308358"),
ts: 1593197039260000,
data: { name: 'Millennium Falcon' }
}Privileges for UDFs
We can grant privileges for UDFs, just as we can on collections and indexes.
Let’s create a simple function that opens the hatch of a spaceship and also writes an entry to the log:
CreateFunction({
  name: "OpenHatch",
  body: Query(
    Lambda("shipRef",
      Do(
        Update(
          Var("shipRef"),
          Let({
            shipDoc: Get(Var("shipRef")),
          }, {
            data:{
              hatchIsOpen: true
            }
          })
        ),
        Create(
          Collection("ShipLogs"),
          {
            data: {
              spaceshipRef: Var("shipRef"),
              status: "HATCH_OPENED",
              pilotRef: CurrentIdentity()
            }
          }
        ),
        "Hatch open!"
      )
    )
  )
})
This function:
-
receives a reference to a ship,
-
modifies the ship’s document and set
hatchIsOpentotrue, -
creates a new document in the
ShipLogscollection, -
returns "Hatch open!" at the end.
If this function is unclear, I recommend going back to part 4 where we go through functions and transactions.
We’d call this function by simply passing a reference of the spaceship:
Call(
  Function("OpenHatch"),
  Ref(Collection("Spaceships"), "266356873589948946")
)
Now, let’s update the privileges to our Pilot role:
Update(Role("Pilot"), {
  privileges: [
    {
      resource: Collection("Spaceships"),
      actions: {create: true, write: true}
    },
    { resource: Collection("ShipLogs"), actions: {create: true} },
    { resource: Function("OpenHatch"), actions: {call: true} }
  ]
})
Other than granting our pilots the privilege to call the OpenHatch
function, we’re also granting privileges to the resources that the
function needs to execute.
The problem is that by setting the call privilege to true, any pilot
would be able to open any hatch of any ship. They could open the hatch
of another spaceship by mistake while warping through a wormhole and
break the space-time continuum!
That’s not good. Let’s make sure pilots can only open the hatch of their own ships.
First, let’s assign Han to his spaceship:
Update(
  Ref(Collection("Spaceships"), "269419218694308358"),
  {
    data: {
      pilotRef: Ref(Collection("SpaceUsers"), "269417695003279879")
    }
  }
)
Now, let’s update our role so that Han can only warp his own ship.
Update(Role("Pilot"), {
  privileges: [
    {
      resource: Collection("Spaceships"),
      actions: {create: true, write: true}
    },
    { resource: Collection("ShipLogs"), actions: {create: true} },
    {
      resource: Function("OpenHatch"),
      actions: {
        call: Query(
          Lambda(
            "shipRef",
            Let(
              {
                shipDoc: Get(Var("shipRef")),
                pilotRef: Select(["data","pilotRef"], Var("shipDoc"), null)
              },
              Equals(CurrentIdentity(), Var("pilotRef"))
            )
          )
        )
      }
    }
  ]
})
This is our Lambda function:
Lambda(
  "shipRef",
  Let(
    {
      shipDoc: Get(Var("shipRef")),
      pilotRef: Select(["data","pilotRef"], Var("shipDoc"), null)
    },
    Equals(CurrentIdentity(), Var("pilotRef"))
  )
)
This Lambda function is going to receive the same arguments that we
are using to call the function. So, we just need to get the spaceship
document and check whether the logged-in user is the same as the pilot.
If we test this using Han’s token on the Falcon:
const result = await client.query(
  q.Call(
    q.Function("OpenHatch"),
    q.Ref(q.Collection("Spaceships"), "269419218694308358")
  )
)
console.log(result);
Hatch open!As expected, a document was created in the logs with the proper references:
{
  "ref": Ref(Collection("ShipLogs"), "269686129668653575"),
  "ts": 1593451585430000,
  "data": {
    "spaceshipRef": Ref(Collection("Spaceships"), "269419218694308358"),
    "status": "HATCH_OPENED",
    "pilotRef": Ref(Collection("SpaceUsers"), "269417695003279879")
  }
}
If we try to call the same function with a different ship reference, we receive an error:
try {
  const result = await client.query(
    q.Call(
      q.Function("OpenHatch"),
      q.Ref(q.Collection("Spaceships"), "266356873589948946")
    )
  )
} catch (error) {
  console.log(error);
}
[PermissionDenied: permission denied] {
name: 'PermissionDenied',
message: 'permission denied',
description: 'Insufficient privileges to perform the action.',
...Conclusion
With this part, we’ve finally reached the end of the tutorial. What an adventure! We’ve traveled through the galaxy, worked with famous pilots, created spaceships, fed futuristic holographic UIs with data… and hopefully, also learned some FQL along the way!
We’ve gone through many common scenarios and problems, but if you ever get stuck you can always get help from the community in the Fauna forums.
Is this article helpful?
Tell Fauna how the article can be improved:
Visit Fauna's forums
or email docs@fauna.com
Thank you for your feedback!
